From Idea to Implementation in Minutes
Josh Burgess •
#platform-engineering#argo-cd#backstage#automation#software-development

Building an IDP
Backstage, Cookiecutter, and ArgoCD AppSets
Have you ever had a brilliant idea for a new service, only to spend hours (or days) wrangling YAML files, setting up pipelines, and questioning your life choices? You’re not alone.
Building software should feel like creating something exciting — not like filling out endless paperwork. That’s where tools like Backstage, Cookiecutter, and ArgoCD come in. They take the boring out of boilerplate and help you go from concept to deployment without losing your sanity.
In this workshop, we’ll break down how these tools work together to streamline development, automate infrastructure, and get your projects running in no time. Whether you’re an engineer drowning in microservices or a team lead trying to enforce best practices without sounding like a dictator, this guide has something for you.
Let’s dive in and turn that idea into a working app — fast. 🚀
What is Backstage?
A fantastic developer experience leads to happy, creative and productive engineers. Our belief is that engineers should not have to be experts in various infrastructure tools to be productive. Infrastructure should be abstracted away so that you can return to building and scaling, quickly and safely. ~ Backstage
Backstage is an open-source developer portal created by Spotify to tame the chaos of infrastructure sprawl. It provides a single, centralized interface where teams can catalog, document, and manage their software efficiently.
Originally built to handle the explosion of microservices and fragmented documentation inside Spotify, Backstage ensures consistency, security, and discoverability while still giving engineering teams autonomy. Since its open-sourcing in 2020, major companies like Netflix, American Airlines, and Toyota have adopted it to streamline developer experience and boost productivity.
What is Cookiecutter?
Scale company best practices and save developer time with repeatable templates your whole team can use ~ Cookiecutter
Cookiecutter is an open-source command-line tool that lets developers generate new projects from predefined templates, reducing manual setup and enforcing best practices across teams.
It’s perfect for organizations that want to maintain uniform project structures, enforce coding standards, and eliminate boilerplate. Whether you’re spinning up backend services, frontend apps, or infrastructure configurations, Cookiecutter helps teams move fast without sacrificing consistency.
What is ArgoCD?
Get More Done with Kubernetes
Open source tools for Kubernetes to run workflows, manage clusters, and do GitOps right. ~ Argo Project
ArgoCD is a GitOps-based continuous delivery (CD) tool for Kubernetes. It ensures that the desired application state defined in Git matches what’s actually running in your Kubernetes cluster.
This enables:
✅ Automated deployments — No manual kubectl commands needed.
✅ Rollback & sync — Easily revert to a stable version if something breaks.
✅ Version control & auditability — Every change is tracked in Git.
By automating Kubernetes deployments with ArgoCD, teams can ship faster, reduce downtime, and keep configurations predictable.
Build Your Own Personal IDP with Kubernetes
This tutorial is a bit longer than my usual ones, but trust me — it’s a fun concept!
We’ll be building a personal Identity Provider (IDP), which can help you:
✅ Reduce boilerplate across personal projects
✅ Test authentication workflows in a local Kubernetes cluster
If you want to take this a step further, ArgoCD is a powerful tool that lets you define everything declaratively — including repositories, clusters, and secrets — all in YAML. This approach is ideal for production use cases where consistency and automation are key.
What You’ll Need (sorry, it’s a bit more than usual!):
- Access to a Unix-based operating system, such as Linux, macOS or Windows Subsystem for Linux
- A GitHub profile
- Docker & kubectl
- Go 1.16+
- npm & yarn
- Python3
- Familiarity with the CLI
- A text editor of your choice (I use Neovim btw!)
Let’s dive in! 🚀
Setting up Kind and Cluster Connectivity
First, we’ll use Kind — a tool for running local Kubernetes clusters inside Docker. Installing it with Go is easy:
go install sigs.k8s.io/kind@v0.26.0
Once installed, create a local cluster with:
kind create cluster
By default, this switches your kubectl context to the new Kind cluster. You can verify it’s running by checking all pods:
kubectl get pod -A
Setting up ArgoCD
Now that our cluster is up and running, let’s install ArgoCD — a tool that simplifies GitOps-based deployments. We’ll use ArgoCD’s quickstart example to apply the necessary Kubernetes manifests.
First, create the argocd namespace and deploy ArgoCD with:
kubectl create namespace argocd
kubectl apply -n argocd -f https://raw.githubusercontent.com/argoproj/argo-cd/stable/manifests/install.yaml
Since this is a local setup, we need to expose the ArgoCD API server by forwarding a port:
kubectl port-forward svc/argocd-server -n argocd 8080:443
The ArgoCD can then be accessed using https://localhost:8080
Username is admin
Retrieve your password with:
kubectl -n argocd get secret argocd-initial-admin-secret -o jsonpath="{.data.password}" | base64 -d
Now you’re all set to start managing deployments with ArgoCD!
Backstage & SealedSecrets
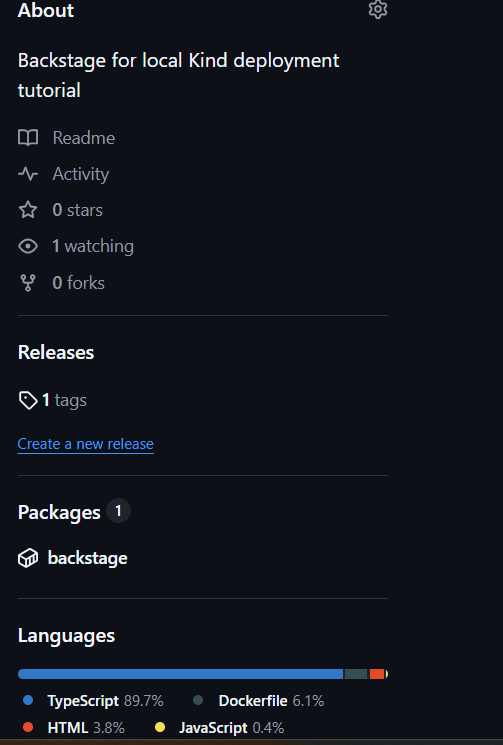
Time to create our first app — your personal internal development portal! We will be using Backstage in our local Kind cluster, but first, we need to make the Backstage app, and the manifests for our K8s cluster.
npx @backstage/create-app@latest
This will install the frontend and backend for Backstage and may take a little bit. The documentation explains the file structure as this:
app-config.yaml: Main configuration file for the app. See Configuration for more information.
catalog-info.yaml: Catalog Entities descriptors. See Descriptor Format of Catalog Entities to get started.
package.json: Root package.json for the project. Note: Be sure that you don’t add any npm dependencies here as they probably should be installed in the intended workspace rather than in the root.
packages/: Lerna leaf packages or “workspaces”. Everything here is going to be a separate package, managed by lerna.
packages/app/: A fully functioning Backstage frontend app that acts as a good starting point for you to get to know Backstage.
packages/backend/: We include a backend that helps power features such as Authentication, Software Catalog, Software Templates and TechDocs amongst other things.
Next you will want to create a new repository in your GitHub account and connect it to this project.
git init
git remote add origin git@github.com:<your-username-here>/my-backstage.git
Then we will want to create a nice CI workflow so every time you update backstage and tag it, the Docker image will be built and shipped to your GitHub Container Registry. This should be made in .github/workflows/build.yml
name: Build and Push Backstage Image

on:
  push:
    tags:
      - '*'

jobs:
  build-and-push:
    name: Build and Push Image
    runs-on: ubuntu-latest

    permissions:
      contents: read
      packages: write

    steps:
      - name: Checkout repository
        uses: actions/checkout@v4

      - name: Set up Node.js
        uses: actions/setup-node@v4
        with:
          node-version: '20'
          cache: 'yarn'

      - name: Install dependencies
        run: yarn install --immutable

      - name: Compile TypeScript
        run: yarn tsc

      - name: Build Backstage backend
        run: yarn build:backend

      - name: Log in to GitHub Container Registry
        run: echo "${{ secrets.GITHUB_TOKEN }}" | docker login ghcr.io -u $GITHUB_ACTOR --password-stdin

      - name: Extract tag name
        id: tag
        run: echo "TAG=${GITHUB_REF#refs/tags/}" >> $GITHUB_ENV

      - name: Build Docker image
        run: |
          docker build -t ghcr.io/${{ github.repository_owner }}/backstage:${{ env.TAG }} -f packages/backend/Dockerfile .

      - name: Push Docker image
        run: |
          docker push ghcr.io/${{ github.repository_owner }}/backstage:${{ env.TAG }}
Now let’s watch this workflow in action by pushing the new Backstage app.
git add . && git commit -m "initial backstage with workflow" && git push && git tag v0.0.1 && git push origin v0.0.1
After a couple minutes you should see:
Next we will primarily be following the Kubernetes deployment docs from Backstage. It is a pretty in depth tutorial, so I have prepared the manifests in my Backstage repo for you to copy; and, if you do, change line 18 in manifests/base/backstage.yml to your container registries path instead so your k8s Pod uses your backstage image.
mkdir manifests
Using this URL: https://github.com/joshbrgs/my-backstage/tree/main/manifests/
You can go to https://download-directory.github.io/ and download my manifests for Backstage. Then unzip it into your new content directory.
Next, you will want to edit your app-config.yaml — which I removed the contents for prod so I just have this for simple setups. You will want to patch it with these values so the backend uses our Postgres instance.
# app-config.yaml
app:
  baseUrl: http://localhost:7077

organization:
  name: MyOrganization

backend:
  baseUrl: http://localhost:7077
  listen:
    port: 7007
  cors:
    origin: http://localhost:7077
  database:
    client: pg
    connection:
      host: ${POSTGRES_HOST}
      port: ${POSTGRES_PORT}
      user: ${POSTGRES_USER}
      password: ${POSTGRES_PASSWORD}

auth:
  # see https://backstage.io/docs/auth/ to learn about auth providers
  providers:
    # See https://backstage.io/docs/auth/guest/provider
    # Doing this to allow guest access, no signing in needed,
    # but you should not do this for production use cases
    guest:
      dangerouslyAllowOutsideDevelopment: true

catalog:
  import:
    entityFilename: catalog-info.yaml
    pullRequestBranchName: backstage-integration
  rules:
    - allow: [Component, System, API, Resource, Location]
  locations:
    # Local example data, file locations are relative to the backend process, typically `packages/backend`
    - type: file
    # The file path needs modified to be direct path due to the files being in a different location in the Docker container
      target: ./examples/entities.yaml

    # Local example template
    - type: file
    # The file path needs modified to be direct path due to the files being in a different location in the Docker container
      target: ./examples/template/template.yaml
      rules:
        - allow: [Template]

    # Local example organizational data
    - type: file
    # The file path needs modified to be direct path due to the files being in a different location in the Docker container
      target: ./examples/org.yaml
      rules:
        - allow: [User, Group]
After these changes, you will need to rebuild the image, and our workflow does this for you as soon as you tag it! So make sure to specify the new tag in the deployment yaml.
Now we are not done yet, because we still need to set the user and password for Postgres and give Backstage a GitHub token, but storing secrets in Git is very insecure unless you take measures to encrypt it. That's why we will be using Bitnami’s SealedSecrets to store the encrypted secret in Git. This article explains Sealed Secrets more in depth.
We first need the Kubeseal client tool, which we can get via Homebrew on Mac.
go install github.com/bitnami-labs/sealed-secrets/cmd/kubeseal@main
Then install the controller into our cluster so it can decrypt the secrets. Make sure to check if you have the latest version here.
kubectl apply -f https://github.com/bitnami-labs/sealed-secrets/releases/download/v0.28.0/controller.yaml
Next, fill in manifests/base/postgres-secrets.yaml with a password and username of your choice in base64. *Make sure not to commit this*
echo "backstage" | base64
echo "posgres-password" | base64
Make a GitHub Token
Git Account Settings > Developer Settings > Personal Access Tokens tab > Tokens (classic)
The token requires these permissions:
Reading software components:
- repo
Reading organization data:
- read:org
- read:user
- user:email
Publishing software templates:
- repo
- workflow (if templates include GitHub workflows)
Then of course base64 encode this and place it as the value of GITHUB_TOKEN in manifests/base/backstage-secrets.yaml.
Next we use kubeseal to encrypt our secrets and these can be committed in Git!
kubeseal < ./manifests/base/backstage-secrets.yml > ./manifests/base/backstage-sealedsecret.yml
kubeseal < ./manifests/base/postgres-secrets.yml > ./manifests/base/postgres-sealedsecret.yml
Now we can watch Argo in action!
Setting up ArgoCD and GitHub
Now that we can access the ArgoCD UI, navigate to the settings panel on the left menu and click ‘Repositories’. We can setup a connection to our GitHub account and let ArgoCD deploy apps in our cluster!
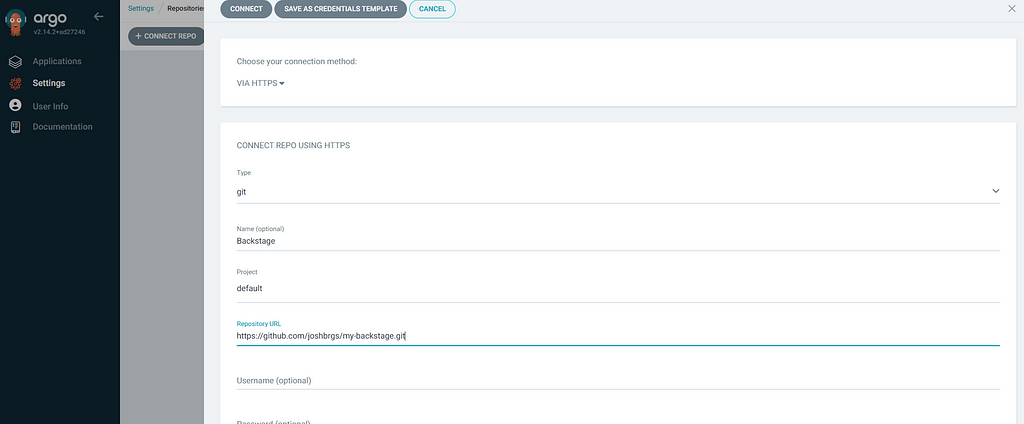
Next we setup an application on the main screen by hitting the “Create Application” button. Name the application and select the default project. Then you should choose the git repository we just added and the manifests directory as the path parameter. Use the default cluster (this kind cluster) and backstage as the namespace.
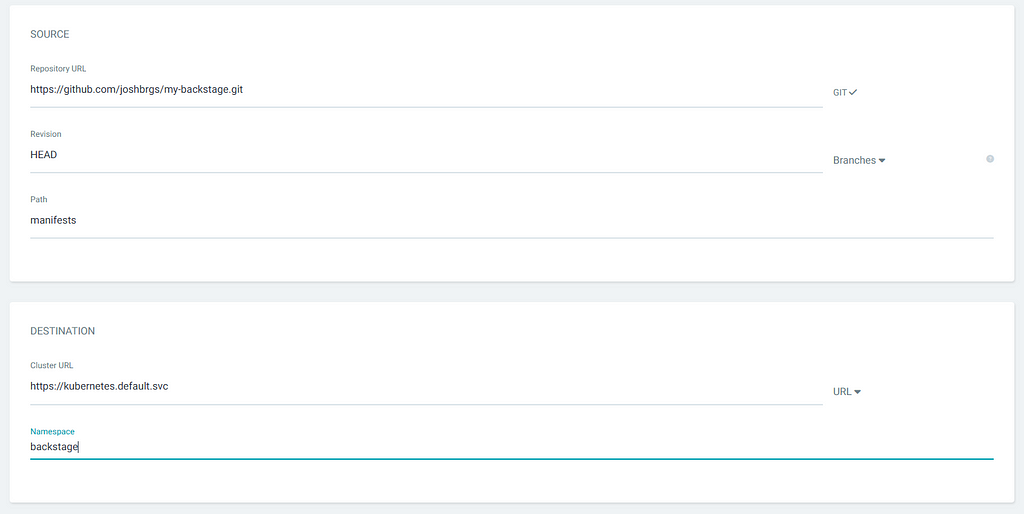
You should see your new backstage application pop up as out of sync, when you manually sync it, it will deploy to your local cluster! Check it out by port forwarding the service like we did ArgoCD this time on http://localhost:7077.
kubectl port-forward svc/backstage -n backstage 7077:80
Integrating Cookiecutter and Backstage
Now let’s show off Backstage’s software template skills. We need to modify our backstage app to use Cookiecutter instead of the built in templating engine — as Cookiecutter is a bit more powerful of a project. Then we will be able to use this template to create a basic React app and deploy it to the cluster!
To install Cookiecutter in our scenario, we will need to add it to our docker image in packages/backend/Dockerfile just under line 30 the previous install dependency.
#previous install ...

RUN apt-get update && apt-get install -y python3 python3-pip
RUN pip3 install cookiecutter

#before USER Node declared
Backstage uses “plugins” to extend functionality to the main application, and Cookiecutter is needed as a plugin to correctly parse the template when using it in our software templates. We will add the plugin by following the readme steps in Backstage.
# From your Backstage root directory
yarn --cwd packages/backend add @backstage/plugin-scaffolder-backend-module-cookiecutter
// In packages/backend/src/index.ts
const backend = createBackend();
// ...
backend.add(import('@backstage/plugin-scaffolder-backend'));
backend.add(import('@backstage/plugin-scaffolder-backend-module-cookiecutter'));
We can create our Cookiecutter template that will let us easily spin up a React app in examples/template/content/ . I have a complete template available in my repository that essentially consists of the basic create-react-app command, manifests, a GitHub workflow modified with Cookiecutter jinja syntax, and manifests for a Pull Request to our Backstage app.
cd examples/template/
rm -rf content/
mkdir -p content
Using this URL: https://github.com/joshbrgs/my-backstage/tree/main/examples/template/content/
You can go to https://download-directory.github.io/ and download my specific template for React using Cookiecutter. Then unzip it into your new content directory.
Now we can edit the example template (examples/template/template.yaml) backstage provided us to create a boilerplate React App with Cookiecutter and an action to create a pull request to our Backstage’s manifest directory.
apiVersion: scaffolder.backstage.io/v1beta3
# https://backstage.io/docs/features/software-catalog/descriptor-format#kind-template
kind: Template
metadata:
  name: react-template
  title: React Template
  description: A React template that creates a basic React app with Cookiecutter
spec:
  owner: user:guest
  type: service

  # These parameters are used to generate the input form in the frontend, and are
  # used to gather input data for the execution of the template.
  parameters:
    - title: Let's React to something
      required:
        - project_name
        - github_username
      properties:
        project_name:
          title: Name
          type: string
          description: Unique name of the app
          ui:autofocus: true
          ui:options:
            rows: 5
        github_username:
          title: Github Username
          type: string
          description: Your github username
          ui:autofocus: true
          ui:options:
            rows: 5

  # These steps are executed in the scaffolder backend, using data that we gathered
  # via the parameters above.
  steps:
    # Each step executes an action, in this case one templates files into the working directory.
    - id: fetch-base
      name: Fetch Base
      action: fetch:cookiecutter
      input:
        url: ./content
        values:
          project_name: ${{ parameters.project_name }}
          github_username: ${{ parameters.github_username }}

    # This step publishes the contents of the working directory to GitHub.
    - id: publish
      name: Publish
      action: publish:github
      input:
        allowedHosts: ['github.com']
        description: This is ${{ parameters.project_name }}
        repoUrl: github.com?repo=app-${{ parameters.project_name|replace(" ", "-")|replace("_", "-")|replace(".", "-")|lower|trim }}&owner=${{ parameters.github_username }}
        sourcePath: ./app-${{ parameters.project_name|replace(" ", "-")|replace("_", "-")|replace(".", "-")|lower|trim }}
        defaultBranch: main
        repoVisibility: public
    # The final step is to register our new component in the catalog.
    - id: register
      name: Register
      action: catalog:register
      input:
        repoContentsUrl: ${{ steps['publish'].output.repoContentsUrl }}
        catalogInfoPath: '/catalog-info.yaml'
        optional: true

    - id: app
      name: ArgoCD App
      action: publish:github:pull-request
      input:
        repoUrl: github.com?repo=my-backstage&owner=${{ parameters.github_username }}
        branchName: argocd-app-${{ parameters.project_name|replace(" ", "-")|replace("_", "-")|replace(".", "-")|lower|trim }}
        targetBranchName: main
        title: Add ArgoCD App for ${{ parameters.project_name }}
        description: |
          This PR adds an ArgoCD App for ${{ parameters.project_name }}.
          It will deploy the app to the `argocd` namespace.
        commitMessage: Add ArgoCD App for ${{ parameters.project_name }}
        sourcePath: ./manifests/
        targetPath: ./manifests/
        update: true
      output:
        remoteUrl: ${{ steps['app'].output.remoteUrl }}


  # Outputs are displayed to the user after a successful execution of the template.
  output:
    links:
      - title: Repository
        url: ${{ steps['publish'].output.remoteUrl }}
      - title: Open in catalog
        icon: catalog
        entityRef: ${{ steps['register'].output.entityRef }}
Then save the project and tag a new version for Backstage to be published with our new template!
Using Backstage
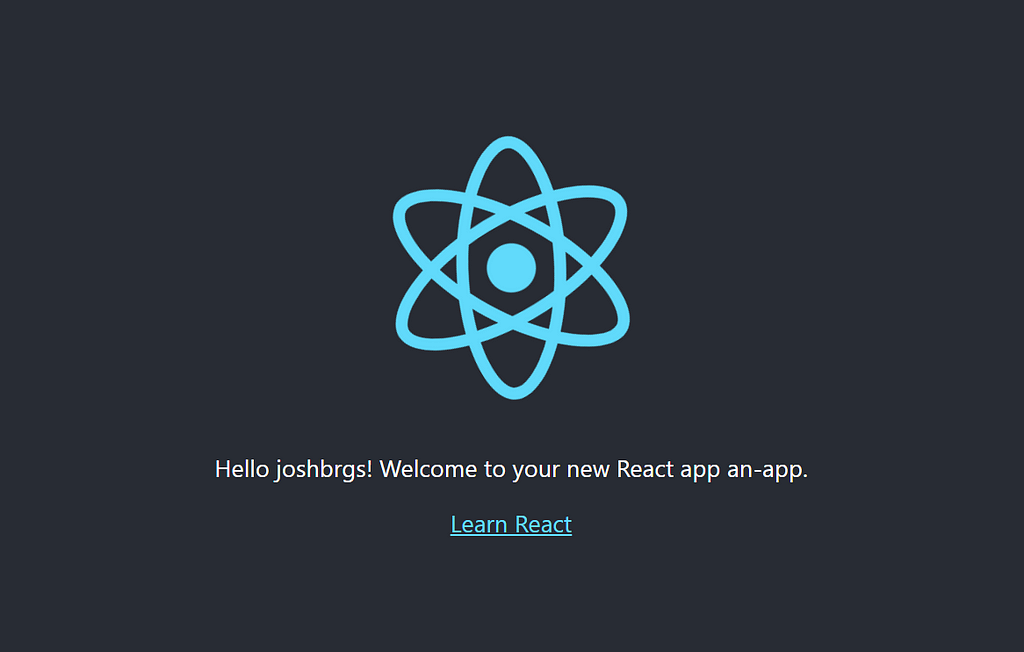
Lets log into Backstage and try out our new software template in the “Create” Tab. Click “Choose” on your React template and fill out the form with your app name and GitHub username and review your inputs in the next step. When you hit create you should now be able to see the component service diagram and in your GitHub account you can see a new repository with a React app in it! The GitHub workflow would have kicked off and built the image for this app too. In your backstage repository, you will find a PR for an application kind for ArgoCD.
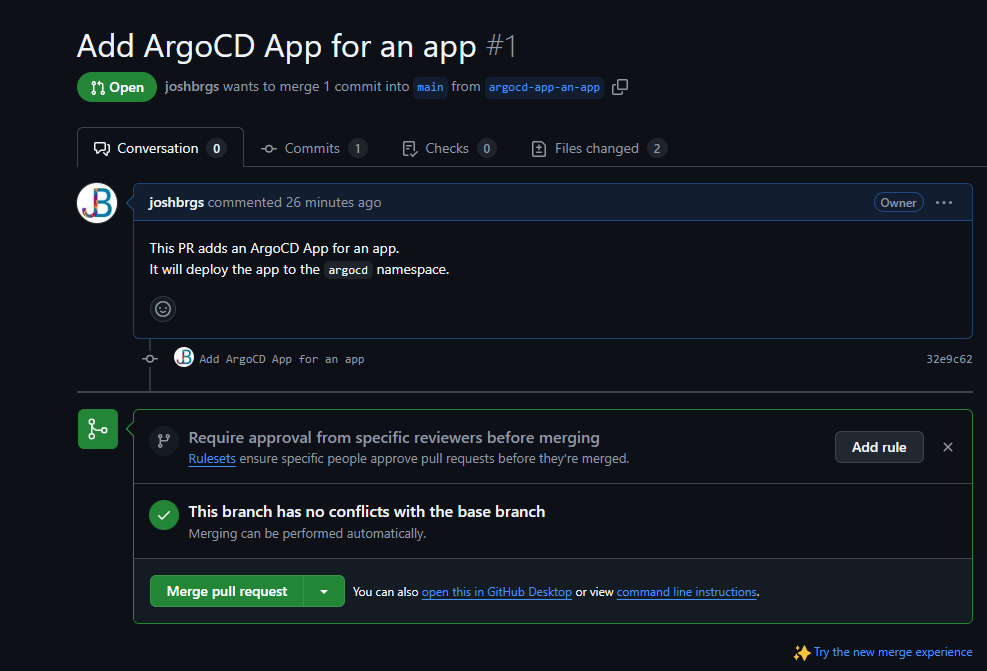
Go ahead and merge this and watch Argo pick up what happened and deploy your new app in the Kind cluster!
You can also port forward your new app:
kubectl port-forward svc/<your service name>-service -n argocd 8090:80
Now you are ready to ship fast!
Conclusion
In a real-world production setup, we’d tweak our configurations to be more battle-ready. ArgoCD should flex in High Availability mode, rock a declarative setup, and keep things secure with SAML or OAuth authentication. Backstage? Same deal — OAuth or SAML for auth, a clean separation between backend and frontend for better scaling, and a managed database instead of a container for some extra horsepower. And while bundling Cookiecutter templates with the app is handy, keeping them in a separate repo makes version control and managing bigger templates way smoother.
Standardizing project templates and operations isn’t just a nice-to-have — it’s a game-changer. It gives developers the freedom to choose their tools while making sure everything stays aligned with company standards. Imagine Backstage as your Internal Developer Platform (IDP), packed with CDKs for infrastructure magic, streamlined Day 2 ops like incident management and user offboarding, and a turbocharged feedback loop that gets changes out the door faster. The result? Happier devs, smoother workflows, and a team that ships like pros. 🚀
References
- Backstage Software Catalog and Developer Platform
- Argo CD - Declarative GitOps CD for Kubernetes
- Cookiecutter
- Quick Start